Fragments of verbose memory

冗長な記憶の断片 - Web技術のメモをほぼ毎日更新

Jan 9, 2026 - 日記

restic: node_modules と .git を除外しつつ「復元可能な開発環境」を維持する設計

restic: node_modules と .git を除外しつつ「復元可能な開発環境」を維持する設計

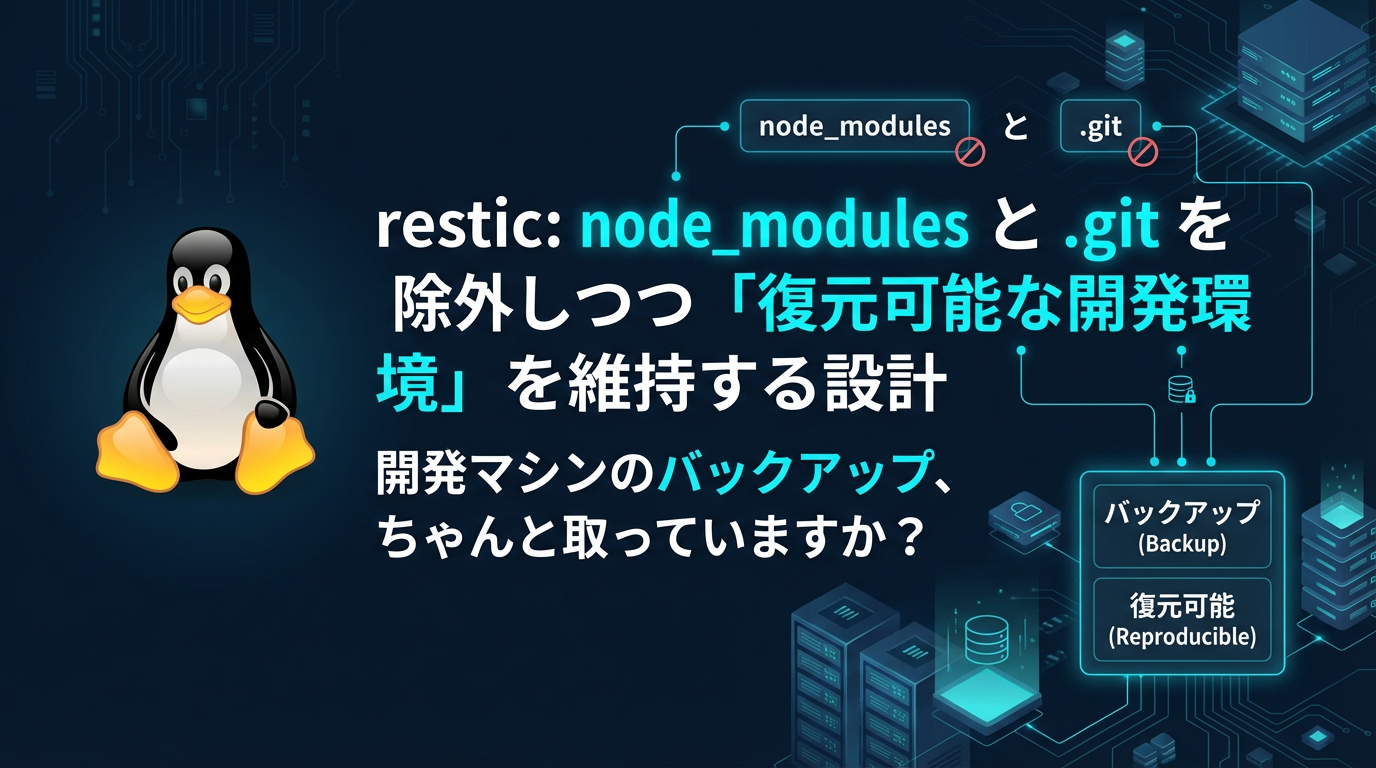
開発マシンのバックアップ、ちゃんと取っていますか?

「Time Machineがあるから大丈夫」「node_modules は git clone すれば復元できるし…」そう思っていた時期が私にもありました。でも、本当に必要な時に復元できないバックアップには意味がありません。

年末の大掃除記事(後編) で restic + resticprofile を紹介しましたが、「具体的にどう設定すればいいの?」という声をいただきました。本記事では、その深掘りとして restic を使った開発環境バックアップの実践的な設計を基礎から解説します。容量を無駄にせず、でも必要なものは確実に復元できる——そんなバランスの取れたバックアップ戦略を構築しましょう。

restic とは?

restic は Go 言語で開発されたモダンなバックアップツールです。2015年の登場以来、シンプルさと強力さで支持を集めています。

主な特徴

  • 暗号化: すべてのデータを AES-256 で暗号化
  • 重複排除: ファイル単位ではなくチャンク単位での効率的な差分管理
  • 増分バックアップ: 初回以降は変更分のみを転送
  • 圧縮対応: v0.14(2022年)から zstd 圧縮に対応
  • 多様なバックエンド: ローカルディスク、S3、SFTP、B2 など 20種類以上のストレージに対応
  • クロスプラットフォーム: macOSLinux 、Windows で同一の使用感

Time Machine や borg との違い

ツール圧縮マルチスレッドクラウド対応主な用途
Time Machine××macOS ローカルバックアップ
borg×Linux サーバー向け
resticクロスプラットフォーム

Time Machine は macOS に統合されているため便利ですが、外付けディスクが必須で柔軟性に欠けます。borg は圧縮率が優秀ですがシングルスレッド動作のため、高速なローカルディスクでは restic に劣ります。

restic は「マルチスレッド + 圧縮 + クラウド対応」の三拍子が揃っており、特に開発者の多様な環境に適しています。

インストール

macOS

1
brew install restic

Linux(Ubuntu/Debian)

1
sudo apt install restic

バージョン確認

1
2
restic version
# restic 0.18.1 compiled with go1.23.x on linux/amd64

基本コンセプト: バックアップの 3-2-1 ルール

バックアップ設計の基本原則として「3-2-1 ルール」があります:

  • 3 つのコピーを持つ(本番データ + バックアップ 2つ)
  • 2 種類の異なるメディアに保存(ローカル + クラウド等)
  • 1 つはオフサイト(物理的に離れた場所)

restic を使えば、このルールを比較的簡単に実現できます。

Step 1: リポジトリの初期化

restic では、バックアップデータを保存する場所を「リポジトリ」と呼びます。まずはローカルディスクにリポジトリを作成してみましょう。

ローカルリポジトリの作成

1
2
3
4
5
# バックアップ先ディレクトリを作成
mkdir -p /Volumes/Backup/restic-repo

# リポジトリを初期化
restic init --repo /Volumes/Backup/restic-repo

パスワードを求められます。これは暗号化キーの生成に使われるため、必ず安全に保管してください。

enter password for new repository: 
enter password again: 
created restic repository 6a3e8a9b at /Volumes/Backup/restic-repo

Please note that knowledge of your password is required to access
the repository. Losing your password means that your data is
irrecoverably lost.

パスワード管理の選択肢

毎回パスワードを入力するのは面倒です。以下の方法で自動化できます。

方法1: パスワードファイル(推奨)

1
2
3
4
5
6
7
8
# パスワードファイルを作成(権限を厳しく設定)
echo "your-secure-password" > ~/.restic-password
chmod 600 ~/.restic-password

# パスワードファイルを指定してバックアップ
restic --repo /Volumes/Backup/restic-repo \
       --password-file ~/.restic-password \
       backup ~/work

方法2: 環境変数

1
2
3
4
5
6
# .zshrc や .bashrc に追加
export RESTIC_REPOSITORY="/Volumes/Backup/restic-repo"
export RESTIC_PASSWORD="your-secure-password"

# 以降、短いコマンドで実行可能
restic backup ~/work

セキュリティ上の注意: 環境変数は ps コマンド等で見える可能性があるため、パスワードファイル方式のほうが安全です。

Step 2: 初回バックアップ

最も単純な形で ~/work ディレクトリをバックアップしてみます。

1
2
3
restic --repo /Volumes/Backup/restic-repo \
       --password-file ~/.restic-password \
       backup ~/work

実行結果:

repository 6a3e8a9b opened (version 2, compression level auto)
created new cache in /Users/tumf/.cache/restic

Files:       12543 new,     0 changed,     0 unmodified
Dirs:         1823 new,     0 changed,     0 unmodified
Added to the repository: 4.2 GiB (3.1 GiB stored)

processed 12543 files, 5.8 GiB in 2:15
snapshot 9a3d7f2e saved

注目すべきポイント:

  • 圧縮効果: 5.8 GiB のデータが 3.1 GiB に圧縮(約 47% 削減)
  • 処理速度: 12,543 ファイルを 2分15秒で処理
  • スナップショットID: 9a3d7f2e が今回のバックアップを識別する ID

Step 3: 開発環境で除外すべきディレクトリ

ここからが本題です。開発環境には大量の一時ファイルやビルド成果物があり、そのままバックアップすると容量を圧迫します。

除外すべき典型的なディレクトリ

Node.js/JavaScript プロジェクト

node_modules/       # 依存パッケージ(package.jsonから復元可能)
.next/              # Next.jsビルド成果物
dist/               # ビルド出力
build/              # ビルド出力
coverage/           # テストカバレッジ
.turbo/             # Turbopack キャッシュ

Python プロジェクト

__pycache__/        # Pythonバイトコード
.venv/              # 仮想環境(requirements.txtから復元可能)
venv/
.pytest_cache/      # pytest キャッシュ
.mypy_cache/        # mypy キャッシュ
.ruff_cache/        # ruff キャッシュ
*.egg-info/         # パッケージメタデータ

Rust プロジェクト

target/             # ビルド成果物(Cargo.tomlから復元可能)

Go プロジェクト

vendor/             # 依存パッケージ(go.modから復元可能)

Git リポジトリ

.git/objects/       # Gitオブジェクト(リモートから復元可能)

ただし、.git/config.git/hooks除外してはいけません。これらはローカル設定を含むためです。

復元可能性の判断基準

除外してよいかどうかの判断基準:

  1. 定義ファイルから完全復元可能か?

    • package.jsonnpm install で復元可能 ✅
    • requirements.txtpip install -r で復元可能 ✅
    • Cargo.tomlcargo build で復元可能 ✅
  2. リモートから取得可能か?

    • .git/objects/git clone or git fetch で復元可能 ✅
    • ローカル未コミットの変更 → 復元不可能 ❌
  3. 再生成に時間がかかりすぎないか?

    • ビルド時間が数分程度 → 除外可能 ✅
    • ビルド時間が数時間 → 状況次第 △

Step 4: exclude パターンの設計

除外ファイルの作成

~/.restic-excludes にパターンを記述します:

 1
 2
 3
 4
 5
 6
 7
 8
 9
10
11
12
13
14
15
16
17
18
19
20
21
22
23
24
25
26
27
28
29
30
31
32
33
34
35
36
37
38
39
40
41
42
43
# ~/.restic-excludes

# Node.js
**/node_modules
**/.next
**/dist
**/build
**/coverage
**/.turbo

# Python
**/__pycache__
**/.venv
**/venv
**/.pytest_cache
**/.mypy_cache
**/.ruff_cache
**/*.egg-info

# Rust
**/target

# Go
**/vendor

# Git objects (configは残す)
**/.git/objects
**/.git/logs
**/.git/refs/remotes

# エディタ・IDE
**/.vscode/.history
**/.idea/workspace.xml
**/.idea/tasks.xml

# macOS
**/.DS_Store
**/._*

# 一時ファイル
**/*.tmp
**/*.log
**/.cache

パターンの書き方

  • **/ で任意の階層にマッチ
  • *.log で拡張子マッチ
  • !pattern で除外の例外を指定(特定ファイルを含める)

除外ファイルを指定してバックアップ

1
2
3
4
restic --repo /Volumes/Backup/restic-repo \
       --password-file ~/.restic-password \
       --exclude-file ~/.restic-excludes \
       backup ~/work

実行結果:

Files:        8234 new,     0 changed,     0 unmodified
Dirs:          983 new,     0 changed,     0 unmodified
Added to the repository: 1.2 GiB (892 MiB stored)

processed 8234 files, 1.8 GiB in 0:45
snapshot b7e2c9a1 saved

除外前は 5.8 GiB だったのが、除外後は 1.8 GiB に削減されました(約 69% 削減)。

exclude-caches の活用

ビルドツールの多くは、キャッシュディレクトリに CACHEDIR.TAG ファイルを配置します。これを自動検出して除外できます:

1
2
3
4
5
restic --repo /Volumes/Backup/restic-repo \
       --password-file ~/.restic-password \
       --exclude-file ~/.restic-excludes \
       --exclude-caches \
       backup ~/work

--exclude-cachesCache Directory Tagging Standard に従った以下の内容を持つファイルがあるディレクトリを除外します:

Signature: 8a477f597d28d172789f06886806bc55
# This file is a cache directory tag.

Docker や Homebrew のキャッシュディレクトリも自動的に除外されます。

Step 5: バックアップの確認と復元

スナップショット一覧

1
2
3
restic --repo /Volumes/Backup/restic-repo \
       --password-file ~/.restic-password \
       snapshots

出力例:

repository 6a3e8a9b opened (version 2, compression level auto)
ID        Time                 Host        Tags        Paths
-------------------------------------------------------------------------
9a3d7f2e  2025-12-28 15:30:00  macbook                 /Users/tumf/work
b7e2c9a1  2025-12-28 16:45:00  macbook                 /Users/tumf/work
-------------------------------------------------------------------------
2 snapshots

特定ファイルの検索

1
2
3
restic --repo /Volumes/Backup/restic-repo \
       --password-file ~/.restic-password \
       find "package.json"

ファイルの復元(部分復元)

特定のファイルだけを復元:

1
2
3
4
5
restic --repo /Volumes/Backup/restic-repo \
       --password-file ~/.restic-password \
       restore b7e2c9a1 \
       --target ~/restore \
       --include "project-name/package.json"

完全復元

スナップショット全体を復元:

1
2
3
4
restic --repo /Volumes/Backup/restic-repo \
       --password-file ~/.restic-password \
       restore latest \
       --target ~/restore

latest は最新のスナップショットを指します。

Step 6: 世代管理(retention policy)

バックアップを取り続けると容量が増えていきます。古いスナップショットを自動削除する「世代管理」を設定しましょう。

forget コマンド

1
2
3
4
5
6
7
8
restic --repo /Volumes/Backup/restic-repo \
       --password-file ~/.restic-password \
       forget \
       --keep-last 5 \
       --keep-daily 7 \
       --keep-weekly 4 \
       --keep-monthly 6 \
       --prune

オプションの意味:

  • --keep-last 5: 最新 5 世代を保持
  • --keep-daily 7: 過去 7 日分の日次バックアップを保持
  • --keep-weekly 4: 過去 4 週分の週次バックアップを保持
  • --keep-monthly 6: 過去 6 ヶ月分の月次バックアップを保持
  • --prune: 削除後に不要なデータブロックを物理削除

世代管理のベストプラクティス

開発環境向けの推奨設定:

 1
 2
 3
 4
 5
 6
 7
 8
 9
10
11
# 頻繁にバックアップする場合
--keep-last 3 \
--keep-daily 7 \
--keep-weekly 4 \
--keep-monthly 3

# ストレージ容量に余裕がある場合
--keep-last 10 \
--keep-daily 14 \
--keep-weekly 8 \
--keep-monthly 12

Step 7: 自動化(スケジューリング)

手動でバックアップするのは忘れがちです。自動化しましょう。

macOS(launchd を使用)

~/Library/LaunchAgents/dev.tumf.restic-backup.plist を作成:

 1
 2
 3
 4
 5
 6
 7
 8
 9
10
11
12
13
14
15
16
17
18
19
20
21
22
23
24
25
26
27
28
29
30
31
32
33
34
35
36
<?xml version="1.0" encoding="UTF-8"?>
<!DOCTYPE plist PUBLIC "-//Apple//DTD PLIST 1.0//EN" "http://www.apple.com/DTDs/PropertyList-1.0.dtd">
<plist version="1.0">
<dict>
    <key>Label</key>
    <string>dev.tumf.restic-backup</string>
    
    <key>ProgramArguments</key>
    <array>
        <string>/opt/homebrew/bin/restic</string>
        <string>--repo</string>
        <string>/Volumes/Backup/restic-repo</string>
        <string>--password-file</string>
        <string>/Users/tumf/.restic-password</string>
        <string>--exclude-file</string>
        <string>/Users/tumf/.restic-excludes</string>
        <string>--exclude-caches</string>
        <string>backup</string>
        <string>/Users/tumf/work</string>
    </array>
    
    <key>StartCalendarInterval</key>
    <dict>
        <key>Hour</key>
        <integer>3</integer>
        <key>Minute</key>
        <integer>0</integer>
    </dict>
    
    <key>StandardOutPath</key>
    <string>/Users/tumf/.restic-backup.log</string>
    
    <key>StandardErrorPath</key>
    <string>/Users/tumf/.restic-backup-error.log</string>
</dict>
</plist>

起動:

1
launchctl load ~/Library/LaunchAgents/dev.tumf.restic-backup.plist

これで毎日午前3時に自動バックアップが実行されます。

Linux(systemd を使用)

~/.config/systemd/user/restic-backup.service を作成:

 1
 2
 3
 4
 5
 6
 7
 8
 9
10
11
12
13
[Unit]
Description=Restic backup service

[Service]
Type=oneshot
ExecStart=/usr/bin/restic --repo /backup/restic-repo \
    --password-file /home/tumf/.restic-password \
    --exclude-file /home/tumf/.restic-excludes \
    --exclude-caches \
    backup /home/tumf/work

[Install]
WantedBy=default.target

~/.config/systemd/user/restic-backup.timer を作成:

1
2
3
4
5
6
7
8
9
[Unit]
Description=Restic backup timer

[Timer]
OnCalendar=*-*-* 03:00:00
Persistent=true

[Install]
WantedBy=timers.target

有効化:

1
2
3
systemctl --user daemon-reload
systemctl --user enable restic-backup.timer
systemctl --user start restic-backup.timer

Step 8: 複数パスワードによる鍵管理

チーム開発や、緊急時のリカバリーを考慮して、複数のパスワードを登録できます。

追加パスワードの登録

1
2
3
restic --repo /Volumes/Backup/restic-repo \
       --password-file ~/.restic-password \
       key add

新しいパスワードを入力すると、別のキーが追加されます。

パスワード一覧

1
2
3
restic --repo /Volumes/Backup/restic-repo \
       --password-file ~/.restic-password \
       key list

出力例:

 ID          User        Host        Created
--------------------------------------------------------------
*eb2e1c89    tumf        macbook     2025-12-28 15:30:00
 a3d7f9b2    tumf        macbook     2025-12-28 16:50:00
--------------------------------------------------------------

* が現在使用中のキーです。

ユースケース

  1. チーム共有: メンバーごとに異なるパスワードを発行
  2. 緊急用キー: 普段は使わない予備パスワードを安全な場所に保管
  3. ローテーション: 定期的にパスワードを変更し、古いキーを削除

古いキーの削除

1
2
3
restic --repo /Volumes/Backup/restic-repo \
       --password-file ~/.restic-password \
       key remove a3d7f9b2

Step 9: クラウドバックエンドの活用

ローカルディスクだけでは「3-2-1 ルール」の「オフサイト」を満たしません。クラウドストレージを追加しましょう。

Backblaze B2(低コスト推奨)

Backblaze B2 は S3 互換で、料金が安く restic との相性が良好です。

 1
 2
 3
 4
 5
 6
 7
 8
 9
10
11
12
13
# 環境変数を設定
export B2_ACCOUNT_ID="your-account-id"
export B2_ACCOUNT_KEY="your-account-key"

# リポジトリ初期化
restic init --repo b2:bucket-name:restic-repo

# バックアップ
restic --repo b2:bucket-name:restic-repo \
       --password-file ~/.restic-password \
       --exclude-file ~/.restic-excludes \
       --exclude-caches \
       backup ~/work

AWS S3

1
2
3
4
5
6
7
8
export AWS_ACCESS_KEY_ID="your-access-key"
export AWS_SECRET_ACCESS_KEY="your-secret-key"

restic init --repo s3:s3.amazonaws.com/bucket-name

restic --repo s3:s3.amazonaws.com/bucket-name \
       --password-file ~/.restic-password \
       backup ~/work

SFTP(自宅NASなど)

1
2
3
4
5
restic init --repo sftp:[email protected]:/backup/restic-repo

restic --repo sftp:[email protected]:/backup/restic-repo \
       --password-file ~/.restic-password \
       backup ~/work

Step 10: バックアップの検証

バックアップが壊れていないか、定期的に検証しましょう。

check コマンド

1
2
3
restic --repo /Volumes/Backup/restic-repo \
       --password-file ~/.restic-password \
       check

出力例:

using temporary cache in /var/folders/...
create exclusive lock for repository
load indexes
check all packs
check snapshots, trees and blobs
no errors were found

read-data オプション(完全検証)

1
2
3
restic --repo /Volumes/Backup/restic-repo \
       --password-file ~/.restic-password \
       check --read-data

すべてのデータブロックを読み込んで検証します(時間がかかります)。月に1回程度の実行を推奨します。

実践例: 私の開発環境バックアップ設定

最後に、私が実際に使っている設定を紹介します。

ディレクトリ構成

~/
├── work/                    # すべてのプロジェクト
├── .restic-password         # パスワードファイル
├── .restic-excludes         # 除外パターン
└── .zshrc                   # 環境変数設定

.zshrc の設定

1
2
3
4
5
6
7
8
# restic エイリアス
export RESTIC_REPOSITORY="/Volumes/Backup/restic-repo"
export RESTIC_PASSWORD_FILE="$HOME/.restic-password"

alias rb='restic backup ~/work --exclude-file ~/.restic-excludes --exclude-caches'
alias rs='restic snapshots'
alias rf='restic forget --keep-last 5 --keep-daily 7 --keep-weekly 4 --keep-monthly 6 --prune'
alias rc='restic check'

日常の運用

 1
 2
 3
 4
 5
 6
 7
 8
 9
10
11
# バックアップ実行(エイリアス使用)
rb

# スナップショット確認
rs

# 古いスナップショット削除
rf

# 月1回の検証
rc --read-data

シンプルですが、これで安心して開発に集中できます。

まとめ

restic を使った開発環境バックアップの設計を解説しました。

重要なポイント:

  1. 除外パターン: node_modules.venv など復元可能なものは除外
  2. 世代管理: forget で古いスナップショットを自動削除
  3. 複数パスワード: チーム共有や緊急用に複数キーを登録
  4. 自動化: launchd/systemd でスケジューリング
  5. オフサイト: クラウドバックエンドで 3-2-1 ルールを実現
  6. 定期検証: check コマンドでデータ整合性を確認

「バックアップは取るだけでは意味がない、復元できなければ」——この言葉を肝に銘じて、定期的な復元テストも忘れずに行いましょう。

次回は、resticprofile を使った複数プロファイル管理や、HTTP Hooks による監視連携について解説する予定です。

参考リンク